
How to bbq chicken. Do you want to know how to BBQ chicken? If so, this blog post is for you! In this blog post, we will answer the question.
“How do I BBQ Chicken?” and provide an easy step-by-step guide that will teach you how. This way, your next bbq can be a success!
From marinating the meat to cooking it, we’ll cover all of the details and provide helpful tips for success. The end result is juicy, flavorful chicken that’s sure to be a crowd-pleaser!
In this blog post, we are going to share 5 sure-fire tips for perfectly cooked grilled chicken that will be tender and juicy every time!
How to Bbq Chicken: 5 Sure-Fire Tips for Perfectly Cooked Grilled Chicken
How To BBQ chicken Perfectly Cooked Grill
Tips #01.
Choose the right cut of chicken- Chicken breast and thighs are both great options for your BBQ.
But if you want to cook them at a low temperature then thighs might be best because they’re not as lean in fat content.
However, if you want to grill at higher temperatures like 400 degrees or more on a gas grill.
I would recommend using chicken breasts because they will cook faster with less time over direct heat from the flame.
Tips #02.
If cooking indoors: Get an indoor/outdoor thermometer – This is my favorite tip! Cooking outdoors can make it difficult (or maybe impossible?)
To determine how hot the coals have become or how effective your spray bottle has been delivering moisture onto the grill grates.
An outdoor/indoor thermometer will let you know the exact temperature of your chicken so it’s not too hot or cold while cooking.
Tips #03.
Let it rest for at least 15 Minutes – I like to use an instant-read meat thermometer and when the internal temps are 160 degrees.
Then remove from heat and cover with a lid or tented foil until it’s safe to slice (about 30 minutes).
This lets all that delicious moisture stay in the meat instead of being dried out by overcooking.
It also allows us to enjoy our perfect BBQ Chicken without having to worry about food safety!
Tips #04.
Use the Right Tools – A good BBQ set includes tongs, long forks, and/or a spatula that can really go under your chicken without using too much of it up.
(and leaving you with not enough room on your grill!) .
I also recommend having an oven mitt or potholder because when taking food from the grill, you never want to touch it bare-handed!
Tip #05.
Don’t Forget About Sauces – One thing I like about grilling is all of the different sauces you can choose from.
There are so many flavor combinations out there! Whether traditional barbecue sauce, sweet balsamic vinegar reduction.
How To Grill BBQ Chicken Breast: Step-by-step guide to perfect grilled chicken every time
1. Rinse and pat dry chicken breast with a paper towel
Place chicken breasts on a cooling rack and let stand at room temperature for 30 minutes.
The reason why you should do it is to avoid the effect of cold meat on the grill.
2. Rub the chicken breast with olive oil, salt, pepper, garlic powder
And onion powder.
Mix the seasoning ingredients in a small bowl, then rub them onto each chicken breast.
On a medium-high grill, cook for 10 minutes on each side until cooked through and the juices run clear…
Use your tongs to turn over frequently (this will ensure uniform cooking).
The trick to turning a chicken breast is to not pierce or tear it when you turn it over.
If you get some holes after grilling, just fill them up with butter later. It’s not a big deal.
3. Place on grill over medium heat for about 10 minutes (turning halfway) or until done.
Use the tongs to place chicken breasts on a grill.
Then close the lid of the barbecue.
Close the lid, and turn it over every 3 minutes until you have nice grill marks (about 10 minutes).
You can see that this grilled chicken has good color on it.
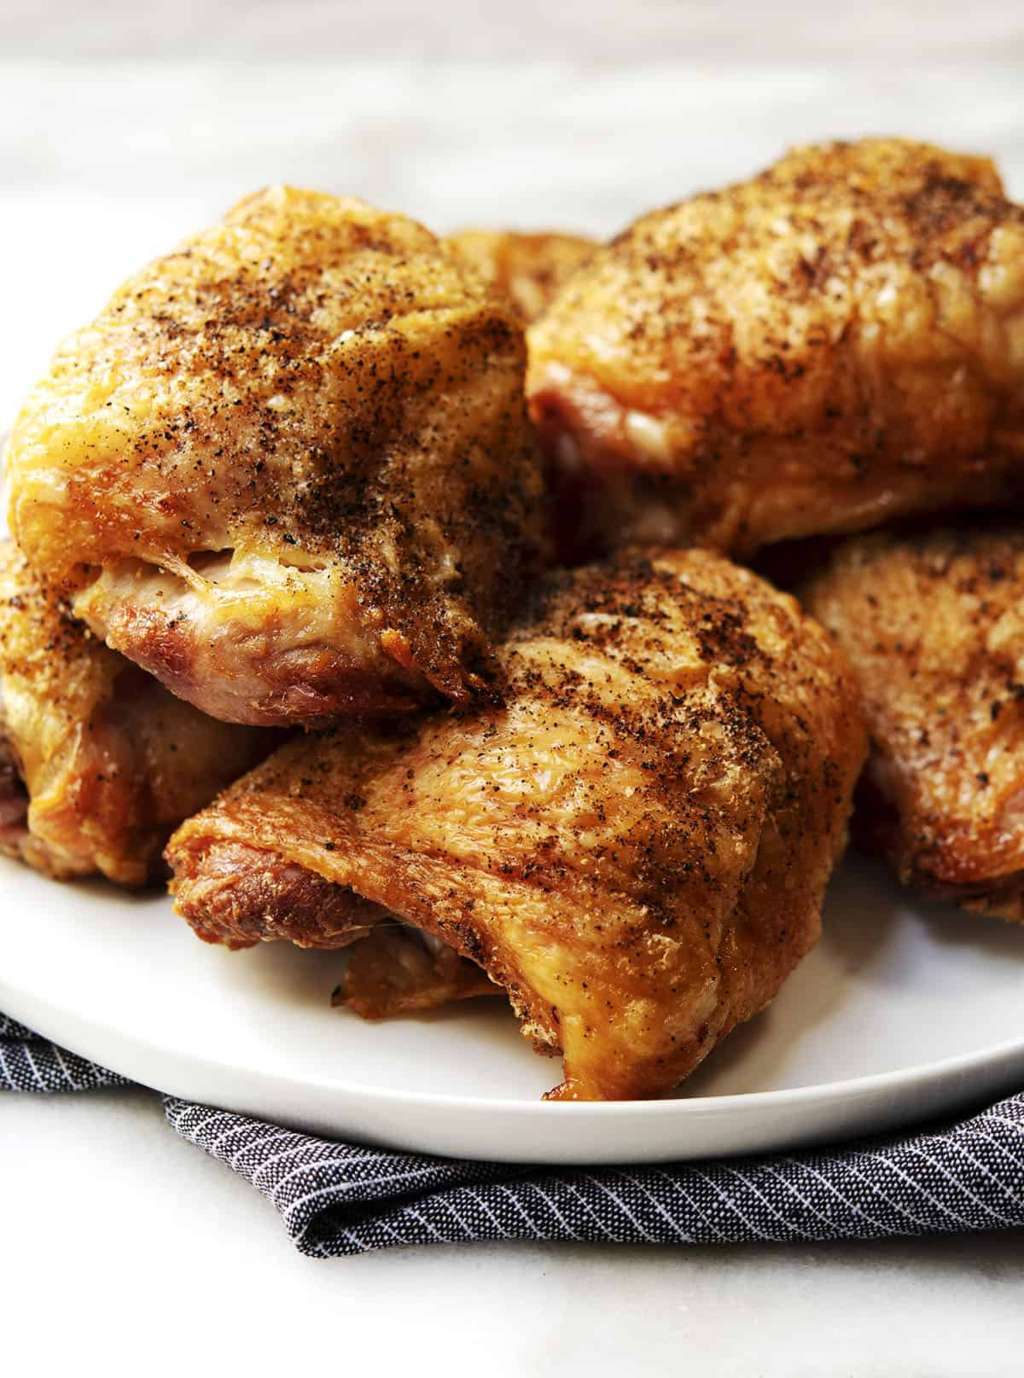
How to Grill BBQ Chicken Breast is ready to serve! Yummy!
How easy is that? Not too hard at all.
Just need some patience when waiting for your yummy grilled food.
I hope my how-to bbq chicken breast guide helps you enjoy grilling healthy food right in your backyard with great results.
In fact, if you do it right, there’s no difference between what you make from inside your home and what you get from a fancy
4. Remove from grill and let rest for 5 minutes before slicing into thin strips.
Place on a plate and serve.
You can use bbq sauce to dip your grilled chicken breast right after you take it off the barbecue grill.
Or let it cool down a bit before adding some bbq sauce.
If you want an extra taste of flavor adds some hot sauce too.
Make sure there’s enough salt in the BBQ sauce otherwise your grilled chicken will turn out bland tasting.
5. Serve with your favorite BBQ sauce!
It’s done!.
I hope my how to make perfect grilling col
How to bbq chicken thighs – How To How To Bbq Chicken Thighs Guide Simply
Barbecuing is one of the tastiest ways of cooking meat and fish.
Everyone has their own way of doing it, but they all share some common elements.
You need a barbecue itself, charcoal or gas, marinades, and dry sauces such as BBQ sauce (e.g. tomato ketchup-based) and sauce mixtures.
Few types of meat are better for barbecuing than chicken. It’s not only tasty; it’s also easy on the wallet compared with other meats like steak or pork chops.
This short guide will show you how to bbq
1. Slice a lemon in half and squeeze the juice onto your chicken
thighs. Whisk the egg and milk with a fork, dip chicken thighs into it, then roll in flour until they are evenly coated.
2. Sprinkle salt, pepper, paprika, garlic powder on both sides of each thigh.
This will act as your dry rub.
Disregard any color in the flour, you are only trying to get a dusting of salt and spices.
3. Place thighs in a large bowl with 1/4 cup of olive oil and cover them
for at least 30 minutes so they can soak up all that flavor
4. preheat oven to 350 degrees Fahrenheit
Place chicken in a baking dish.
Bake for 30 minutes and remove from the oven once they are fully cooked.
5. Line baking sheet with aluminum foil or parchment paper
Place barbecued chicken thighs on the lined baking sheet.
Feta is a cheese with a pleasant sweet tartness that complements chicken, as do olives and tomatoes.
If you like feta, chop it into 1/4-inch cubes before adding to the omelet mixture.
You can also sprinkle more paprika over your finished omelet if desired.
6. Place thighs on prepared pan skin side down and bake for 25-35 minutes or until juices run clear when you cut into the meat near the bone.
Remove from oven and let sit for 15 minutes. Cut into serving-size pieces, removing the bones from each piece as you go.
When ready to serve, lay chicken thighs skin side up on a large baking sheet covered with foil or parchment paper. Brush thighs generously and evenly with sauce mixture.
The place turned off the grill over the top of the chicken so it can catch drippings from the meat while keeping them warm until the coating is dry and crisp.
Cook for 10-15 minutes longer or until coating is dark golden brown and chicken is no longer pink inside (check by cutting open one of the larger end pieces).
Remove from heat immediately after it reaches desired color so it doesn’t burn! You may want to spray the grill rack again before placing it.
8. Serve with your favorite dipping sauce!
Chicken Thighs are the perfect meal for all times of the year, but especially during grilling season.
Pair it with coleslaw and baked beans! Enjoy.
How To Bbq Chicken Thighs Guide Simply This is a must-try dry rub recipe that’s equally tasty on boneless, skinless chicken breasts or thighs.
It’s easy—just mix together the ingredients in a small bowl, spread them over your cooked chicken pieces, and let stand at room temperature until the flavors deepen up
Pros and cons of charcoal vs gas grill
If you’ve been considering switching from a charcoal grill to a gas one, this article will give the pros and cons of both.
You might be surprised by what you learn! So if you want to find out more about the pros and cons of gas grills, read on!
The Pros and Cons of a Charcoal Grill

The Best Charcoal Grills
Standard benefits:
– You’ll have a great time with friends and family.
– Your food will taste so much better.
Emotional benefits:
– You’ll be able to cook like your favorite professional chef!
These are the best charcoal grills for gas, temperature control, and are easy to clean.
Go to The Best Charcoal Grills On Amazon
Pros
The charcoal grill is a great way for you to cook up some delicious foods! It may taste better than other types of grills or it could just provide that primal feeling while cooking over coals.
There are a few reasons to opt for a charcoal grill, not the least of which is cost.
You can get a charcoal grill for less than $100 (and in some cases much less) and it’s more affordable overall than other types of grills.
A charcoal grill also offers the true, cooked-over-afire feeling that you just don’t get with gas or electric models.
There might be something about how the food tastes when it’s grilled over coals as well–maybe there should be a study done on this!
Cons
A drawback to using one could be how hard they are to clean up afterward.
While ash from burning coal will often collect at the bottom of your grill, if you’ve had any sauces drip off of your food, they might be stuck on there and difficult to get rid of.
The Pros and Cons of a Gas Grill

The best gas grills
There are many reasons why our customers love their Gas Grills.
One of the main reasons is that they offer a variety of cooking options, including direct or indirect heat and sear zones for searing meats with flavorful juices sealed in by the grill’s lid.
The customer reviews for the product 2,660 ratings.
Sturdiness 9.2 Score
Value for money 9.4 Score
Temperature Control 9.4 Score
Standard benefits:
– The best gas grills on the market.
– Top-quality materials.
Emotional benefits:
– You’ll be able to enjoy BBQ every day of the year
Go to The Best Gas Grills On Amazon
Pros
– Easy to light – you don’t need any lighter fluid, just turn the knob and press down the button.
Then wait for a few minutes before cooking with it.
This is especially important if you are new to grilling and want something foolproof!
– You can cook with gas or charcoal – while this isn’t always an advantage (you might not use both).
Sometimes storing other types of fuel means needing more space in your grill area.
Gas only requires electricity so there’s less clean-up when switching between materials.
– Cleanup afterward is easier too because some people prefer natural ventilation overusing exhaust ports that let out fumes into their living spaces.
Natural vents mean fewer chemicals from cleaning products as well as less mess.
– Gas grills also produce less smoke, which is a plus for some people with allergies or asthma that can be exacerbated by cooking food on charcoal grills and the subsequent inhalation of smoke particles into their lungs.
Cons
– Cost – gas grills are more expensive than most other types because they require electricity to operate (although this may not always be true).
With an electric bill coming each month, you’ll need to find a way to offset those costs if it means paying more at the end of your billing cycle.
The odd thing about this pros/cons list is this one is actually both!
If you want convenience without extra cost then go ahead and buy one but just make sure you budget.
Conclusion
How to bbq chicken perfectly cooked grill. It is so important to cook your chicken thoroughly and not over-cook it.
The end goal of the process is to cook a chicken that’s moist, juicy, and tender.
Let’s get started! Check out our expert tips for how to BBQ Chicken perfectly cooked grill in 10 steps below.
1) Preheat your grill or smoker – This will ensure even cooking across all areas of the meat
2) Apply your favorite spice rub – If you have one
3) Season with salt & pepper
4) Pat dry
5) Place on hot grill skin side down
6) Flip after about 8-10 minutes
7) Cook until an internal temperature reaches 165 degrees F
8 ) Remove from heat
9 ) Cover loosely with foil
10) rest under tented foil for at least 15 minutes before carving up
Source: silkroadrestaurant.org
Category: BLOG